Its been about 3 months since i started on the Material X Viewer, and while ive kept basically the same materials ive been putting a lot of work into the viewer itself, so that it doesnt break as I scale up to rewrite all my shaders, and to improve the website. Future versions are version pinned so my posts should properly reflect progress from here out.
New features I recently added include single material view, a graph view, fixes for offscreen/unfocused behavior, a bunch of formatting fixes on different platforms, fallbacks for unsupported hardware, and a fullscreen mode tested working on mobile and a PC.
By including the graph as a function of the viewer I was able to render out the files as graph connections like you would see in Maya or other node based editors, and I can organize it to read a bit more cleanly. I also added pan/zoom as well as drilling into dashed nodes – this should be mode helpful as the graphs grow in complexity.
The basis for all of the blends, the dot product of the surface normal and the world up vector provides a 0-1 blend from the most upward facing surfaces to the most downward facing surfaces. Maya is 0,1,0 while Unreal is 0,0,1.
Remapping the controls to accept values between 0-1 for the offset and blend. This allows it to behave more like a snow shader, with a 100% snow portion, a 100% base portion, and a controllable blend in between. At 0 offset the snow only appears at the most straight up angles, at 1 it appears at 90 degree angles, and pushed to 2 it covers the rest. The blend is also controllable between 0-1 although it can also be pushed beyond 1 for extra sharpness.
I added noise to the blend, to disrupt the gradient appearance. I did this by adding noise to the offset, which in turn added waves to the boundary between the overlay material and the base material. While i experimented with 3D noise in Maya i found it didnt work in Unreal so I made a tileable 2d noise texture instead, which i was able to use in the same way.
In the last 2 weeks ive been taking a break from tools to port my shader library to MaterialX. MaterialX is an open source cross platform standard for materials and features a graph editor with many of the nodes and functions you would find in HLSL/CGFX. It was developed by ILM and is gaining traction in a lot of studios recently. While it has many of the nodes you will be familiar with if you have built shaders for Unreal or Unity, there are a few that I wasn’t able to locate and ended up building myself. There are also a few nodes where its important to understand what they’re doing to save you time and nodes.
Linear Interpolate (Lerp)
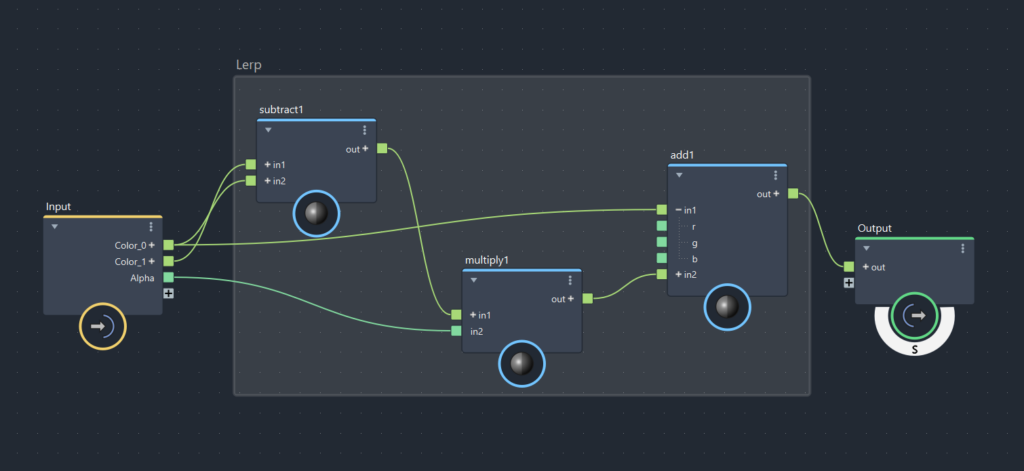
Lerp is one of the most common blends in games but not found in MaterialX. Putting this into a compound allows you to duplicate it and use it like a regular node like you would in Unreal/Unity
Camera Position
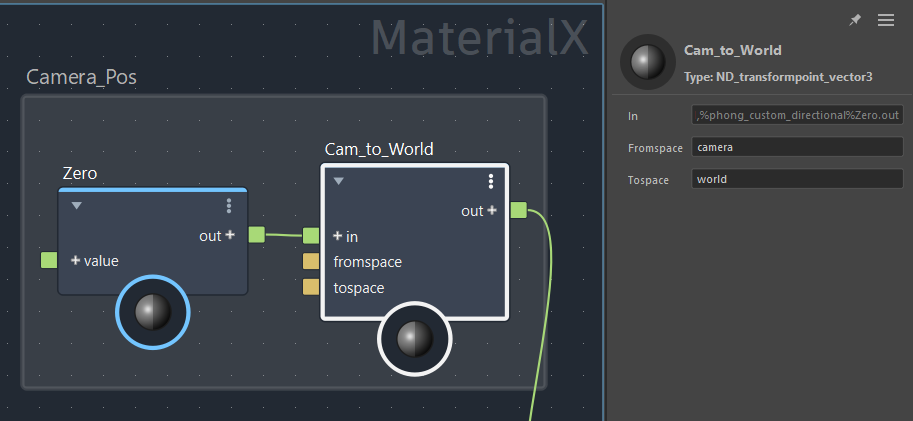
MaterialX does not have a node for the camera position which is needed for a number of effects. Instead you can use a transformpoint node to transform (0,0,0) from camera to world space
Normal Maps
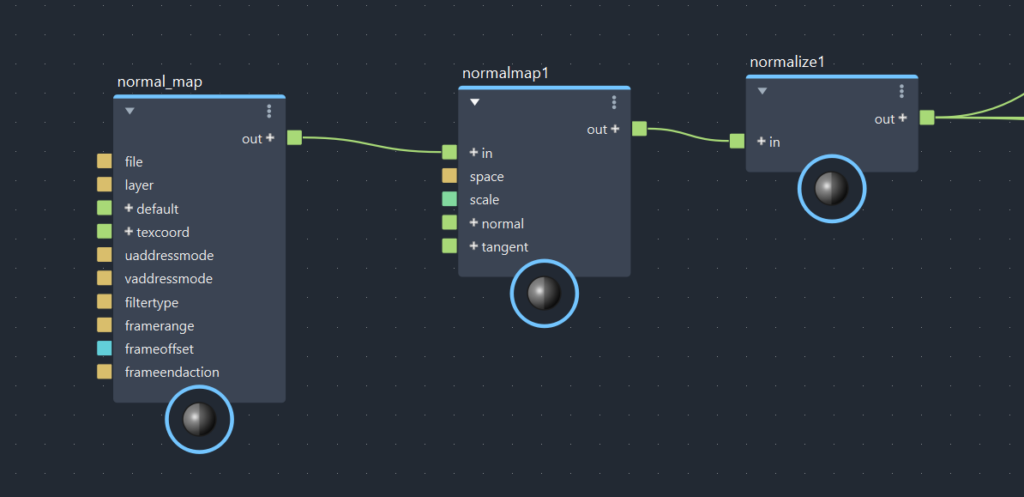
Normal maps can be sampled with a regular texture node set to RAW and a normalmap node. The normalmap node handles the unpacking of the texture (*2-1) and the transformation into worldspace. Call me paranoid but I normalize my normals just in case the geometry is strange.
Fresnel
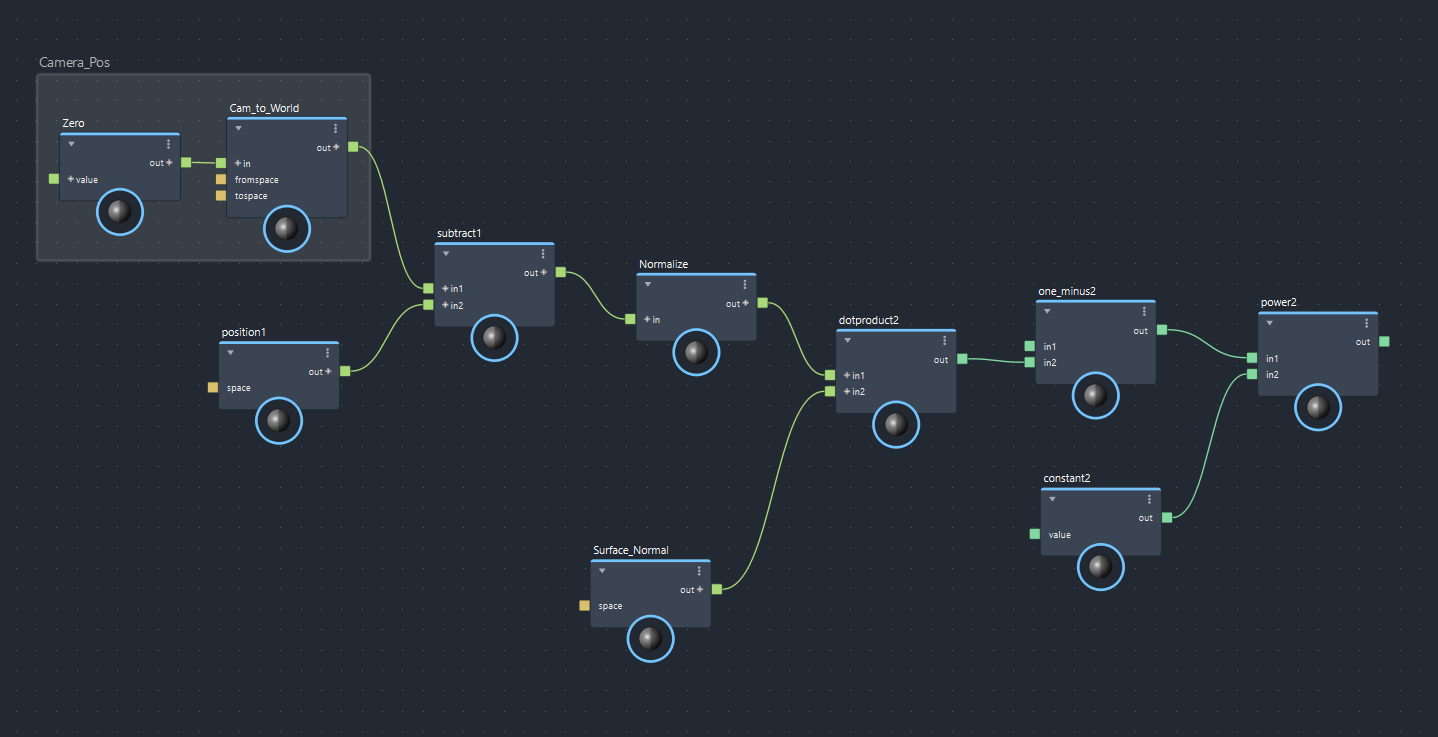
Fresnel blends are useful for a lot of things. While MaterialX does not have a node for that you can build a graph to accomplish the same thing using our custom camera position. We subtract the world position of the geometry and normalize it, then get the dot against the surface normal. MaterialX does not have a one minus node, but that can be easily created with a float subtract – just set the first pin to 1. Taking the Power of that value will produce a Frensel whose tightness is controllable by the constant in the graph
Combining RGB channels in Arnold is bugged
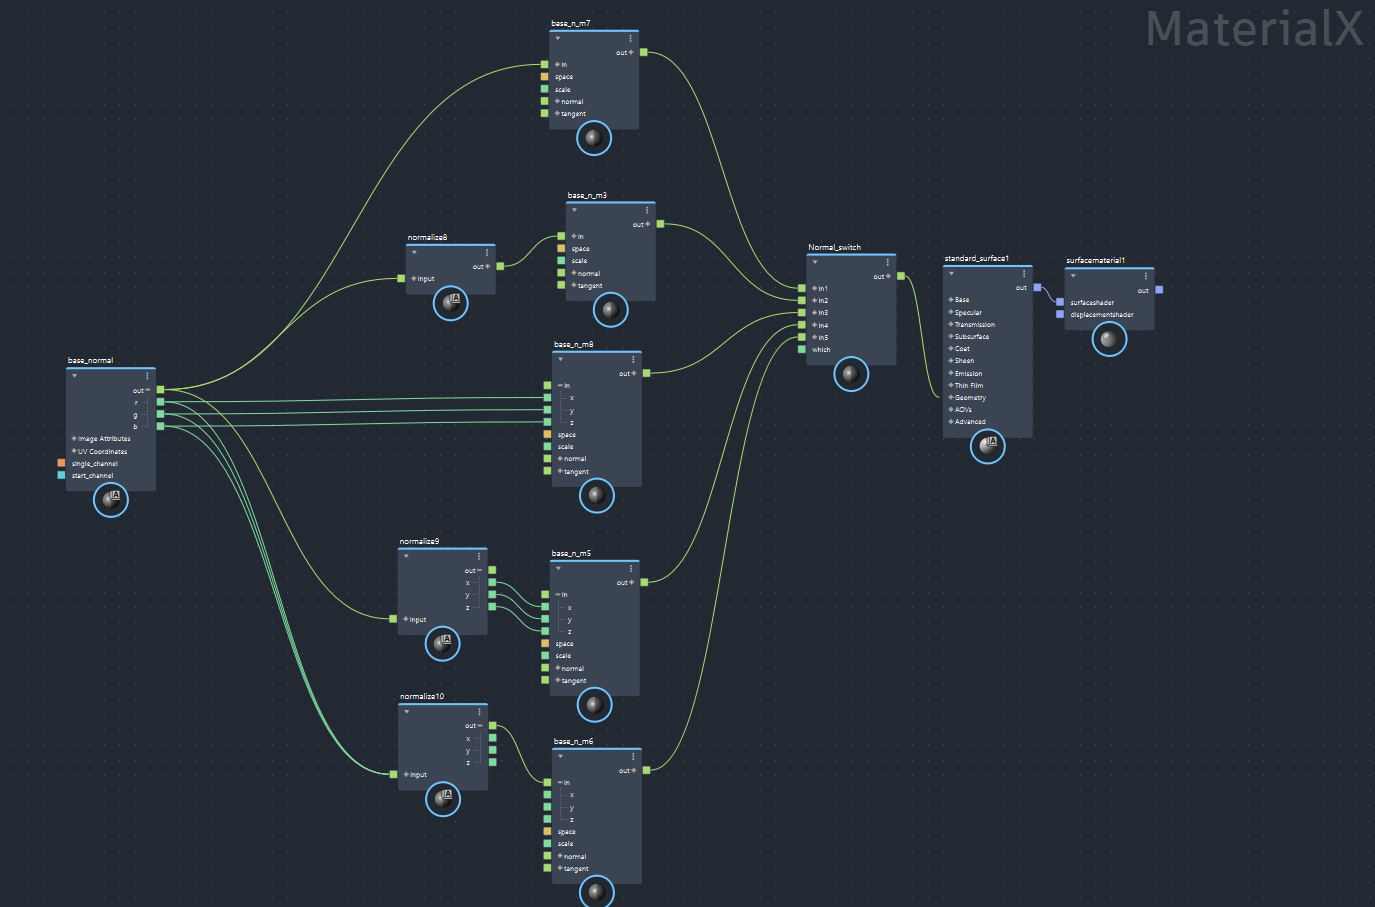
I encountered a bug with Arnold where it looked like my surface normals went through the blender. To reproduce it in Maya 2025, you just need to combine the rgb channels of a texture back together and then use a normalmap node like normal. In the above picture, the first 2 pins of the switch work as expected. When the channels are passed in individually to the normalmap or normalize node in the final 3 pins the normals break. This rules out detail normals in Arnold for now, which is dissapointing.
Anything else important to add to this? I’ll probably find some more as i progress in rebuilding my materials
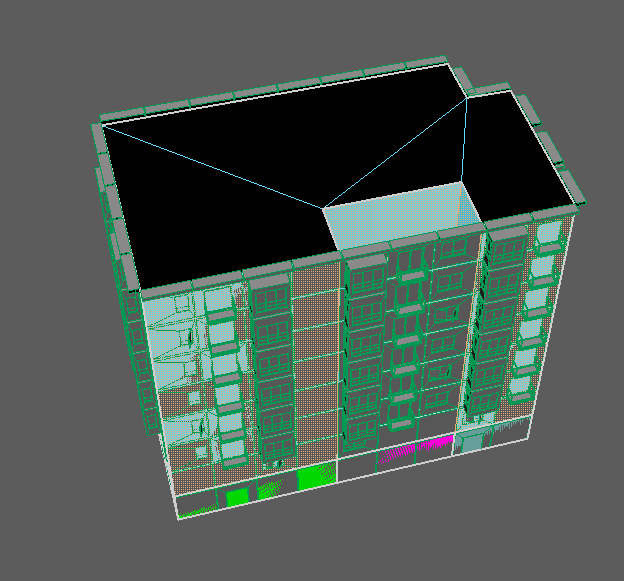
Just a short video this time. I rebuilt the system for tracking the instances association with faces, to handle splits and extrusions more easily. Previously instances were associated with one face, and when a mesh was split or extruded the name of the face will change, disassociating the instances. Now i am tracking groups of faces via vertex color and uvs. This way even if you split or extrude a face, it will retain its color and thus its association. Additionally the uvs allow tracking of the instances position of the face prior to being split, allowing them to both retain their position if the verts have not moved and to reposition instances that are no longer matching the face.
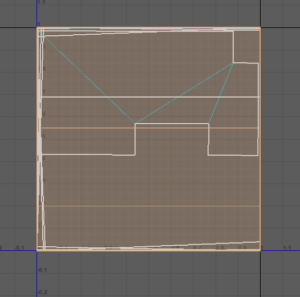
The new methods of tracking introduced some issues if the uvs were not setup properly up and down. This would result in the wrong instances being selected, and produce some odd results.
One other bit i added to rebuilding was i made sure it still obeyed whatever was set in Keep Faces Together. This means you could start blocking out the building and spacing the instances equally, and then update the building with Keep Faces Together to snap the instances back together. Then you can modify the building mesh again to fit the meshes without gaps or any measuring to do it.